


Your Event Day Game Plan: 10 Must-Do Onsite Logistics Moves
Discover essential strategies to streamline onsite logistics on the day of your event. Ensure your events run smoothly. Read the article to elevate your event planning skills.

Why Onsite Event Planning Can Make or Break Attendee Engagement
Your event strategy might include a high-impact marketing plan, well-placed paid ads, and selecting the right venue—but if your onsite logistics break down, all your hard work risks falling apart in real time.
Whether you're organizing trade shows, hybrid events, or a high-stakes in-person summit, the event day is where every decision is tested—from how well your team communicates, to how efficiently you resolve onsite issues.
This is the day, when you give the justice to your pre-event logistics plan. You need regular meetings, clear escalation paths, real-time tracking and the right tools to ensure every element aligns. When everything clicks, your target audience enjoys a seamless experience, your brand earns trust, and you maximize your event's full potential.
10 Onsite Execution Steps to Keep Your Event Goals on Track
1. Arrive Early on the Event Date to Lead with Confidence
Your early arrival is the foundation for a successful event day, being the first onsite ensures you're ready to lead and respond before attendees or vendors arrive.
Timing:
- Arrive 2–4 hours before vendor setup starts.
- For larger or high-risk events, arrive the evening before and do a preliminary inspection.
- Align your event date arrival with key vendor access windows outlined during the event planning process.
What to Do Immediately:
- Unlock the venue and conduct a first physical check of entrances, bathrooms, green rooms, and emergency exits.
- Set up your command center or control room with power, Wi-Fi, backups, and printed resources.
- Run through the entire event layout using your event management software or floorplan app.
Bring an Emergency Kit:
- Include tape, markers, zip ties, power banks, multi-plugs, safety pins, extra lanyards, signage holders, first-aid items, USBs with backups of presentations, and snacks.
- Prepare a mobile event app login guide and test it onsite for any live event changes.
Prep Your Staff:
- Conduct a 10-minute pre-brief with staff and volunteers: assign zones, review the event strategy, and reconfirm escalation paths.
- Use this time to align on your event goals, audience personas, and any VIP or speaker arrivals.
Troubleshooting Mindset:
- Address late vendor arrivals or missing elements early.
- If issues pop up, stay calm, document them, and problem solve using your team leads.
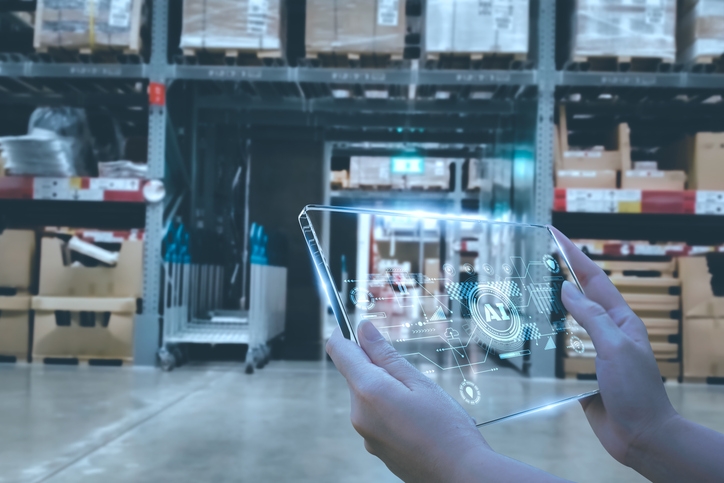
Tool Tip: Use Azavista or other event management platforms to track setup progress live and flag risks to maintain momentum toward a smooth-running event.

2. Run a Final Walkthrough to Align Your Event Day Plan and Vendors
The final walkthrough is your last line of defense before attendees arrive. It ensures your planning transitions smoothly into execution—no missing cables, misplaced signage, or unexpected surprises.
Who Should Join:
- Event manager
- AV lead and setup crew
- Venue coordinator
- Lead vendors (catering, registration, décor)
- Logistics lead from your internal event team
Walkthrough Timing:
- Start 60–90 minutes before registration opens.
- For hybrid events or complex builds, schedule two walkthroughs: one during vendor load-in and one after full setup.
What to Check — Full Walkthrough Checklist:
Execution Tips:
- Assign one person to document issues using your event management app or even a Google Sheet.
- Use floor plan PDFs or mobile layout maps on tablets to annotate issues live.
- Snap photos of problem areas to flag for vendors.
During the Walkthrough:
- Track event progress visually and digitally.
- Update event dashboards and inform the team about fixes in motion.
- Ensure you’re aligned with the marketing plan, branding standards, and AV cues.
Final Coordination:
- Confirm event promotion signage is displayed at photo booths, check-in areas, and major entry points.
- Make sure post-event survey QR codes are embedded in signage or mobile apps.
- Rebrief your staff post-walkthrough on any last-minute changes.
3. Set Up an Event Command Center for Real-Time Coordination
Your onsite logistics command center is the mission control of your live event. It centralizes decision-making, tracks event progress, and enables fast issue resolution—essential for both in-person and hybrid events. Your entire event relies on this room being well-stocked, secured, and operated by people who know the full plan. Think of it as your North Star for the event day.
Where to Place It:
- Locate near registration, backstage, or central access point.
- Ensure strong Wi-Fi, power, and security (badge-only entry).
- Allow only core staff and managers into this zone.
Must-Have Equipment:
Pro Tips:
- Have a backup lead stationed here during breaks or shift changes.
- Keep a printed copy of all vendor SLAs and contact sheets for emergencies.
- Use tools like Azavista dashboards or shared Trello boards to track key details and responsibilities.
4. Test All Event Technology and Build Backup Plans
Tech fails are the no.1 reasons, which led to event failure. Don’t wait for problems—test every device, system, and stream to avoid disasters and ensure a successful event. Every glitch avoided saves attendee confidence and protects the event’s return on all your efforts.
What to Test in Every Zone:
- Wi-Fi & Connectivity: Test bandwidth, device load, and login flow.
- Badge Printing & Check-In: Print test badges and scan QR/NFC codes.
- AV Setup: Confirm mic levels, projector clarity, and backup cables.
- Hybrid Streaming: Check screen share, audio sync, and stream quality.
- Charging Stations: Plug in devices and confirm charging speed.
Must-Have Backup Inventory:
- Extra laptop preloaded with presentations
- USBs with media backups (including sponsor loops)
- HDMI/VGA/USB-C adapters for unknown AV setups
- Wireless clickers and extra batteries
- Extra hotspot device or SIM card in case of Wi-Fi failure
Pro Tips:
- Assign one tech lead per zone (main stage, registration, breakout, etc.).
- Document all logins, passwords, and tech roles using your event management platform.
- For virtual or hybrid events, use redundant streams and record sessions for playback.
5. Create a Smooth Check-In Process to Boost First Impressions
The first 10 minutes are where you either gain trust or cause frustration. A frictionless check-in experience ensures high attendee engagement and sets the tone for a smooth-running event.
It improves attendee mood, builds trust, and sets the foundation for strong networking, attendee engagement, and overall event success.
Must-Have Check-In Setup:
Check-In Lanes
Set up clearly marked lanes for different attendee categories including General Admission, VIPs, Sponsors, and Speakers. This minimizes confusion and helps manage traffic efficiently at peak arrival times.
Staff and Volunteers
Ensure all staff and volunteers at the check-in area are well-trained, approachable, and equipped with scanners or tablets. They should be briefed on the check-in process, troubleshooting protocol, and escalation contacts.
Badge Printing
Use instant badge printers that support QR code or NFC-based access. This allows for quick and seamless check-in, reducing queues and improving first impressions.
Troubleshooting Table
Designate a separate table near check-in for resolving issues such as missing registrations, misprinted badges, or tech errors. Staff this station with a senior volunteer or team member who has access to your event management software and escalation contacts.
Signage Essentials:
- Use clear, large-format signs for each lane.
- Place floor decals for line guidance and venue navigation.
- Include maps and mobile event app download QR codes near check-in.
Tips for Faster Processing:
- Use pre-event QR codes, facial recognition, or express check-in links.
- Send reminder emails 24 hours before the event with login and QR code instructions.
- For high-volume events, use staggered entry times with email campaigns to reduce congestion.
6. Track Vendor Setup Using Event Management Software
Vendor setup delays can derail your entire event strategy. Keep all vendors aligned and accountable using tools, documentation, and real-time tracking.
This structure not only helps your event run smoothly but also gives you performance data for post event reporting and future vendor selection—key for future events and developing full potential of your planning process.
Key Setup Milestones to Monitor:
How to Monitor Execution:
- Use event management software to track delivery confirmations and live task status.
- Conduct zone-wise walkthroughs every 30–45 minutes to verify setup progress.
- Maintain a vendor dashboard with traffic light indicators (Green = Done, Yellow = Pending, Red = Delayed).
Vendor Coordination Tips:
- Send out final vendor setup instructions 48 hours prior to the event.
- Share load-in maps, power access zones, and dock timing in a centralized drive.
- Assign vendor leads per category and create escalation paths for delays.
Performance Metrics to Track for Post Event Reporting:
- On-time setup completion rate
- Number of escalations handled
- Delivery accuracy per vendor
- Service-level adherence vs. contract
7. Coordinate Staff Roles and Escalation Paths Clearly
Well-structured staff coordination is essential for managing events of any scale. Staffing plans reduce stress, speed up issue resolution, and help you scale your event strategy across different event types and sizes.
When every person knows exactly what to do, where to be, and who to escalate to, you prevent confusion and allow the event management process to run seamlessly.
Execution Steps:
Tools to Support This:
- WhatsApp or Slack channels segmented by zone
- Radio walkie-talkies with coded communication
- Staff badges with color-coded zones and escalation level
Pro Tips:
- Keep laminated escalation trees at the onsite command center
- Use team-specific lanyard colors to quickly identify volunteers, tech crew, logistics staff, and medical support
- Build this structure into your future event planning templates so it becomes a repeatable best practice
8. Use Live Dashboards and Messaging Tools to Stay Aligned
When you're overseeing multiple zones, vendors, and attendees, real-time tracking is non-negotiable. Live dashboards give you visibility, while messaging tools enable quick coordination—helping you keep the entire event on track.
Execution Tips:
- Assign 1–2 team members to monitor incoming messages and flag urgent issues to you or zone leads
- Use emojis or status tags in Slack/WhatsApp to identify urgency levels without overwhelming everyone
- Sync these tools with your post-event reporting system to later assess what worked and what didn’t
Why It Matters:
- Supports risk management by flagging delays or emergencies early
- Improves attendee networking and satisfaction by preventing miscommunication
- Helps you measure success and gain insights for future events
9. Stay Visible as the Event Manager and Empower Your Team
As the event planner or logistics lead, your visibility boosts confidence for staff and stakeholders alike. Your walk-through presence keeps things proactive and reinforces strong event strategy execution.
Your presence is a mobile support system—people need to see leadership in action for the event to run smoothly.
How to Stay Accessible:
- Wear a distinguishable badge, shirt, or vest labeled "Event Manager" or “Lead Coordinator”
- Stay mobile: Create a route to circle through key zones every 30–60 minutes
- Check in with stakeholders: Greet VIPs, sponsors, and speakers to reinforce relationships and solve needs early
- Avoid micromanaging: Trust your leads to handle first-level problems so you can focus on high-impact issues
Pro Tips:
- Use a small clipboard or digital checklist to track zone issues on the fly
- Take 5 minutes every 2 hours to update your central dashboard or huddle with key staff

10. Wrap Up with a Structured Teardown and Post-Event Review
Too many events fall apart at teardown due to poor end-of-day planning. Instead, treat event wrap-up as a phase of its own within your event management process to ensure accountability, cleanliness, and future reusability.
End-of-Day Teardown Checklist:
Bonus Tip:
- Leave a thank-you note or small token for the venue staff. It builds goodwill for other events and helps with future event planning.
Resource to Create:
- Use a digital teardown checklist in your event tech platform
- Create a teardown briefing document with contact info, timing, and role assignments
- Start building a post-event survey for vendors and staff while insights are still fresh
Don’t let teardown be an afterthought—this is where strong organization, gratitude, and documentation lay the foundation for your next successful event.
Use Event Management Software to Simplify Your Entire Day
Manual checklists and spreadsheets can't keep up with the pace of live events. Platforms like Azavista centralize everything—staff assignments, vendor tracking, layout maps, and attendee registration—so you’re not scrambling during crunch time.
What You Can Do:
- Assign team tasks and monitor progress in real-time
- Track vendor check-ins and setup milestones
- Push live updates to attendees via mobile event apps
- Sync layout maps, schedules, and registration data in one place
Pro Tip: Automate reminders and log real-time issues for smoother post-event reporting and smarter future event planning.
Using smart event technology allows your team to work closely across functions, ensuring your target audience gets the experience they expect—whether it's a high-impact trade show, hybrid event, or corporate summit.
Conclusion: Onsite Logistics Brings Your Event Planning to Life
Your event day is the moment all planning, promotion, and coordination come together. It’s not just about solving problems—it’s about proving your event strategy works.
Arrive early. Use real-time tools. Empower your team. Keep your potential attendees focused on the experience—not the hiccups.
When your onsite logistics run smoothly, your entire event feels seamless—driving better engagement, brand perception, and measurable success.
Ready to streamline your next event? Explore how Azavista can simplify your onsite logistics and unlock your event’s full potential.
More Event Management